




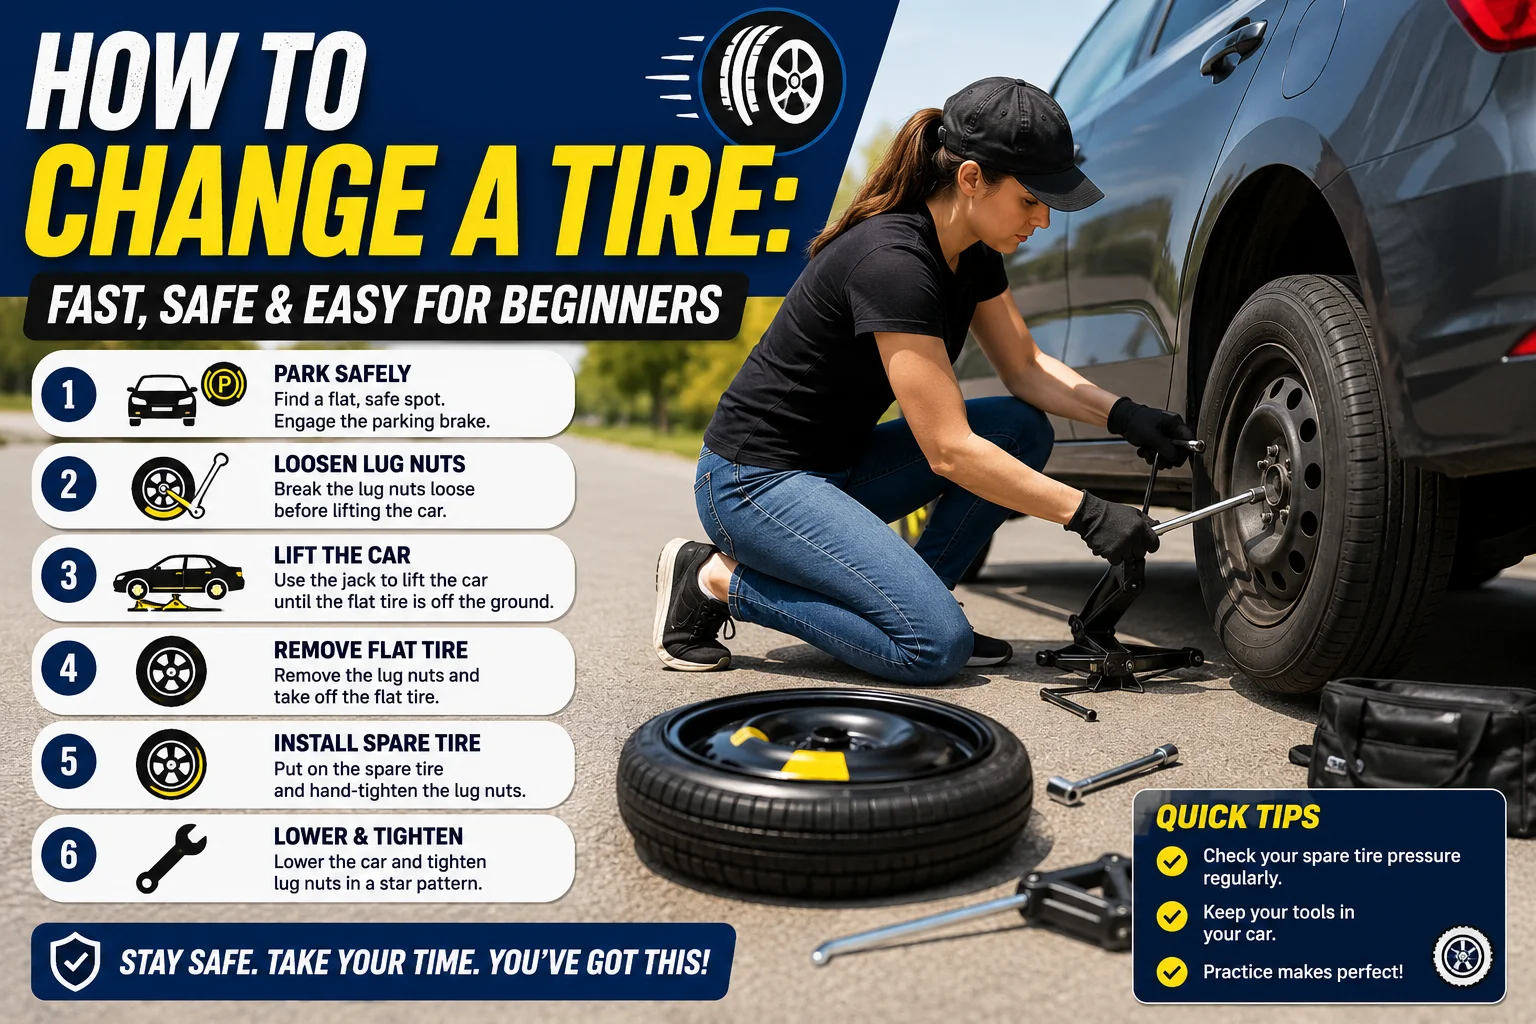
How to Change a Tire: Fast, Safe & Easy for Beginners
A flat tire can happen to anyone, whether you’re driving to work, heading out on a road trip, or simply running errands. Knowing how to change a tire is an essential skill that can save you time, money, and the inconvenience of waiting for roadside assistance. While it may seem intimidating at first, the process is straightforward when you have the right tools and follow the correct steps.
Why Learning How to Change a Tire Is Important
A flat tire often happens without warning. Sharp objects, potholes, worn tread, or sudden blowouts can leave you stranded. Knowing how to replace a damaged tire allows you to:
- Get back on the road quickly.
- Stay safe in emergencies.
- Avoid expensive towing fees.
- Build confidence in handling basic vehicle maintenance.
Even if you have roadside assistance, understanding the process helps you know what’s happening and ensures you’re prepared if help isn’t immediately available.
Tools You’ll Need
Before you begin, make sure you have these essential tools in your vehicle.
Spare Tire
Most vehicles come with either a full-size spare or a compact temporary spare (often called a “donut”).
Car Jack
The jack lifts your vehicle so the damaged tire can be removed.
Lug Wrench
This tool loosens and tightens the lug nuts that secure the wheel.
Wheel Wedges (Optional)
Wheel chocks or wedges help prevent the vehicle from rolling while it’s lifted.
Flashlight
Useful if you’re changing a tire at night or in poor lighting.
Gloves
Work gloves keep your hands cleaner and provide a better grip.
Step 1: Find a Safe Location
Safety should always come first.
If you notice a flat tire while driving:
- Slow down gradually.
- Avoid sudden braking.
- Turn on your hazard lights.
- Pull over onto a flat, stable surface away from traffic.
Avoid stopping on curves, hills, or soft ground whenever possible.
Step 2: Secure the Vehicle
Before lifting the vehicle:
- Shift into Park (automatic) or first gear (manual).
- Apply the parking brake.
- Place wheel wedges behind or in front of the tires if available.
- Turn off the engine.
These precautions help prevent the vehicle from moving.
Step 3: Remove the Hubcap (If Necessary)
Some vehicles have hubcaps covering the lug nuts.
Use the flat end of the lug wrench or a suitable tool to gently remove the hubcap before loosening the lug nuts.
If your vehicle has exposed lug nuts, you can skip this step.
Step 4: Loosen the Lug Nuts
Before raising the vehicle:
- Place the lug wrench on one lug nut.
- Turn it counterclockwise.
- Loosen each lug nut about one full turn.
Do not remove them completely yet.
It may require considerable force if the lug nuts were tightened with power tools.
Step 5: Position the Jack Correctly
Locate the Jacking Point
Every vehicle has reinforced lifting points located behind the front wheels and in front of the rear wheels.
Check your owner’s manual to identify the correct location.
Raise the Vehicle
Pump or crank the jack until the flat tire is approximately 5–6 inches off the ground.
Never place any part of your body underneath a vehicle supported only by a jack.
Step 6: Remove the Flat Tire
Now remove the loosened lug nuts completely.
Place them somewhere safe so they won’t roll away.
Grip the tire firmly with both hands and pull it straight toward you until it slides off the wheel hub.
Lay the flat tire flat on the ground.
Step 7: Install the Spare Tire
Line up the holes in the spare tire with the wheel bolts.
Push the tire onto the hub until it sits securely.
Replace the lug nuts by hand.
Tighten each nut just enough to hold the wheel in place.
Step 8: Tighten the Lug Nuts in a Star Pattern
Rather than tightening one nut fully at a time, use a star or crisscross pattern.
This helps distribute pressure evenly and ensures the wheel sits properly on the hub.
Do not fully tighten them while the vehicle is still lifted.
Step 9: Lower the Vehicle
Slowly lower the jack until the spare tire touches the ground completely.
Remove the jack from underneath the vehicle.
Now tighten each lug nut firmly using the same star pattern.
Use steady pressure to ensure each nut is secure.
Step 10: Check Tire Pressure
Temporary spare tires often lose pressure over time.
If you have a tire pressure gauge, check that the spare matches the recommended PSI listed inside the driver’s door or in the owner’s manual.
Driving on an underinflated spare can be dangerous.
What to Do After Changing the Tire
Changing the tire is only a temporary solution if you’re using a compact spare.
You should:
- Visit a tire repair shop as soon as possible.
- Repair or replace the damaged tire.
- Inspect the wheel for damage.
- Repack all tools into your vehicle.
- Recheck lug nut tightness after driving 25–50 miles.
Common Mistakes Beginners Should Avoid
Lifting the Car Before Loosening Lug Nuts
Always loosen the lug nuts before using the jack. Otherwise, the wheel may spin while you’re trying to remove them.
Using the Wrong Jack Position
Improper jack placement can damage the vehicle or cause it to slip.
Forgetting the Parking Brake
A rolling vehicle creates a serious safety hazard.
Overlooking Tire Pressure
A spare tire with low air pressure may not be safe to drive on.
Driving Too Fast on a Temporary Spare
Most compact spare tires have a maximum speed limit of around 50 mph (80 km/h) and are intended for short distances only.
Tips to Prevent Flat Tires
Proper tire maintenance reduces the risk of unexpected flats.
Check Tire Pressure Monthly
Correct tire pressure improves handling and extends tire life.
Inspect Tire Tread
Replace tires that have worn tread or visible damage.
Avoid Road Hazards
Drive carefully around potholes, construction debris, and sharp objects.
Rotate Tires Regularly
Regular tire rotations promote even wear and improve longevity.
Carry an Emergency Kit
Keep these items in your vehicle:
- Tire pressure gauge
- Flashlight
- Gloves
- Reflective safety vest
- Portable air compressor
- Emergency warning triangle
When You Should Not Change a Tire Yourself
Sometimes it’s safer to call roadside assistance.
Avoid changing the tire if:
- You’re on a busy highway with little shoulder space.
- The weather is severe.
- The vehicle is on an unstable surface.
- The jack is damaged.
- Multiple tires are flat.
- The wheel appears bent or severely damaged.
Your safety is always more important than replacing the tire yourself.
Final Thoughts
Learning how to change a tire is one of the most valuable skills every driver can have. With a few simple tools, the right safety precautions, and a step-by-step approach, even beginners can replace a flat tire confidently. Practice locating your spare tire, jack, and lug wrench before an emergency happens, and always inspect your tires regularly to reduce the chances of getting stranded. Knowing what to do in advance ensures you’ll stay calm, safe, and ready whenever a flat tire occurs.